So, to get the best gaming experience on your PC, you need to update your display driver in Windows 10. Even if your PC doesn’t have a dedicated graphic chipset, you can update your onboard graphics display driver. Also Read: 30 Best Driver Updating Tools for Windows 10
5 Best Methods to Update Display Driver
Microsoft offers multiple ways to update the display driver in Windows 10. You can update it through the Windows updates, Device Manager Page, or your display manufacturer’s official website. This article will share a few best methods to update the display driver in Windows 10. Let’s check out.
1. Using Windows Update
The good thing about Windows 10 is that it automatically installs all required drivers on your computer. The best and easiest way to update the display driver is by using the Windows update feature. During Windows updates, the operating system looks for every available driver update. It automatically downloads and installs the required driver in the background. Here’s how to use Windows Update to update the display driver in Windows 10.
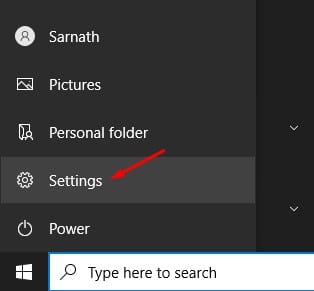
First, click the Start button and then the Settings gear icon.
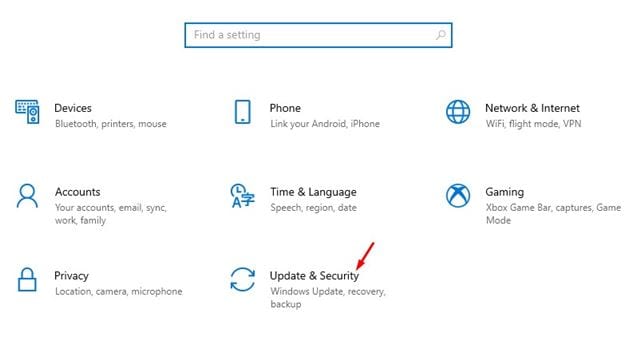
On the Settings page, click on the Update & Security option.
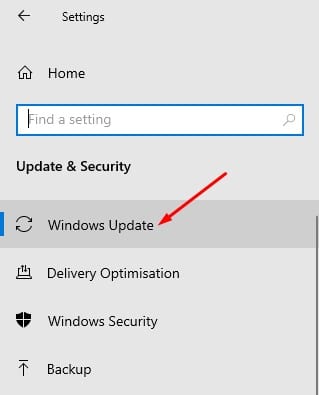
On the left pane, click on the Windows update option.
On the Right pane, click the Check for Updates option.
Once done, click on the View all optional updates link.
Expand the driver updates section on the next page and choose the display driver. That’s it! You are done. Windows 10 will not download and install the display driver on your PC.
2. Update the Driver from the Device Manager
You can also update your display driver from Windows 10’s Device Manager. For that, you must follow some of the simple steps below.
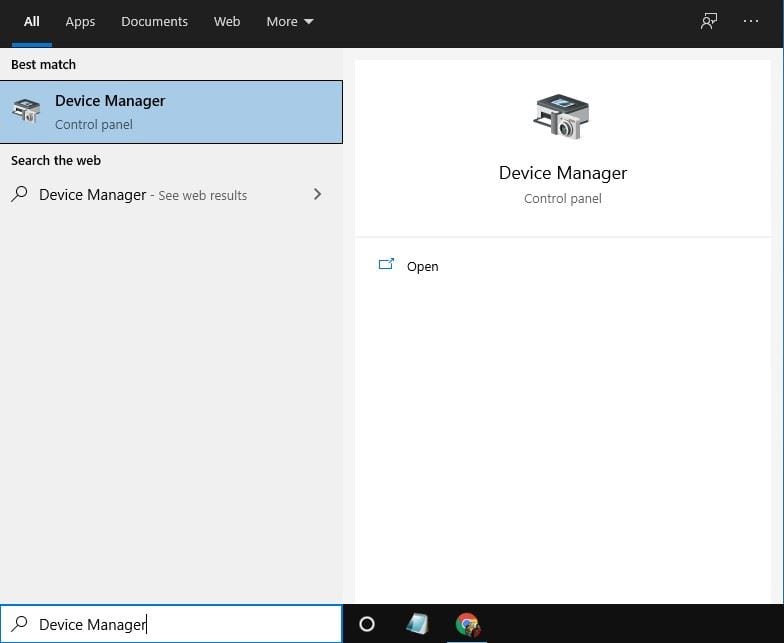
First, open Windows search and type in Device Manager.
Open Device Manager from the list of options.
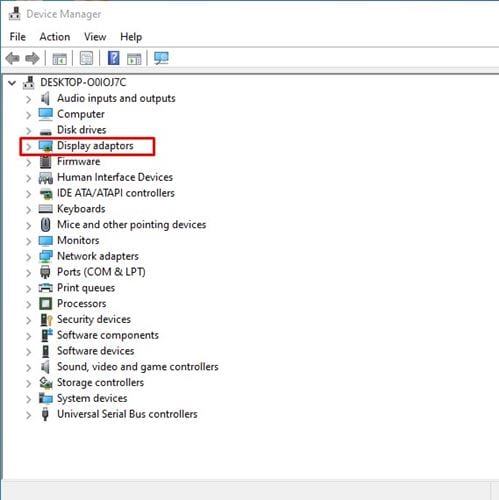
On the Device Manager page, expand the Display adaptors option.
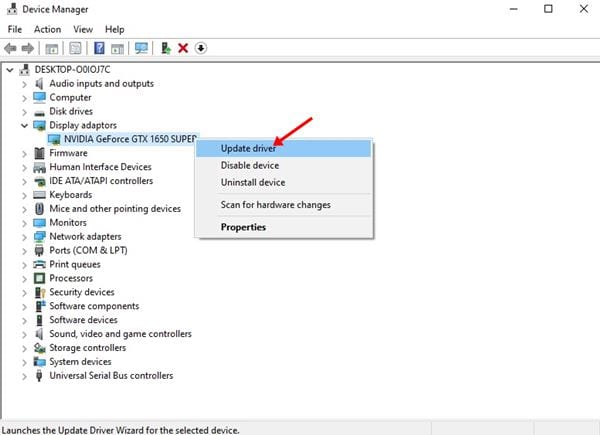
Right-click on the display device and select Update Driver.
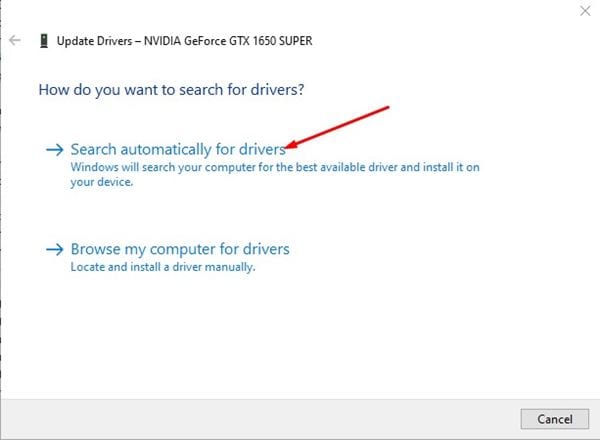
Next Window will provide you with two options. Click on the Search automatically for drivers.
That’s it! You are done. Now Windows 10 will search for the latest version of the Display driver. If it finds any, it will install it on its own.
3. Uninstall Driver from the Windows 10
This method will force Windows 10 to install the latest version of the display driver. For that, follow some of the simple steps given below.
Open Device Manager from the list of options.
On the Device Manager page, expand the Display adaptors option.
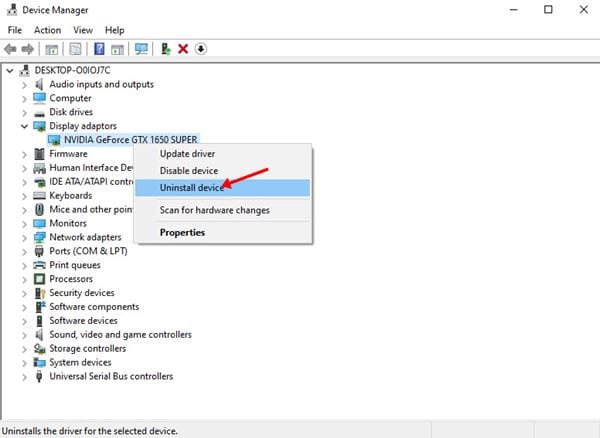
Right-click on the display device and select Uninstall device. This will uninstall the device.
Now restart your PC. Windows 10 will automatically install the latest version of the device driver during the restart. That’s it! You are done. This is how you can reinstall the display driver on Windows 10 computer.
4. Download & Install the Display Driver from Manufacturer’s Website
Depending on the graphic card you are using, you can visit the manufacturer’s website to download the most up-to-date version of the display driver. If you use Nvidia graphics, you must visit the Nvidia website. Below, we have listed the official website of both Nvidia and Radeon.
AMD Driver & Support Nvidia Driver & Support
Once downloaded, you can install the driver directly on your PC by running the executable file.
5. Using Driver Updater Software
Currently, hundreds of driver updater software are available for Windows 10. You can use the free ones to get your display driver updated. On Techviral, we have already shared a list of the best driver updating tools for Windows 10. We recommend checking this link – 30 Best Driver Updating Tools for Windows 10 to get the preferred software. After installing the tools, just run them on your system. Driver updating tools will automatically detect the outdated driver and install the new one. These are the five best ways to update the display driver in Windows 10 computers. I hope this article helped you! Please share it with your friends also. If you have any doubts, let us know in the comment box below.
